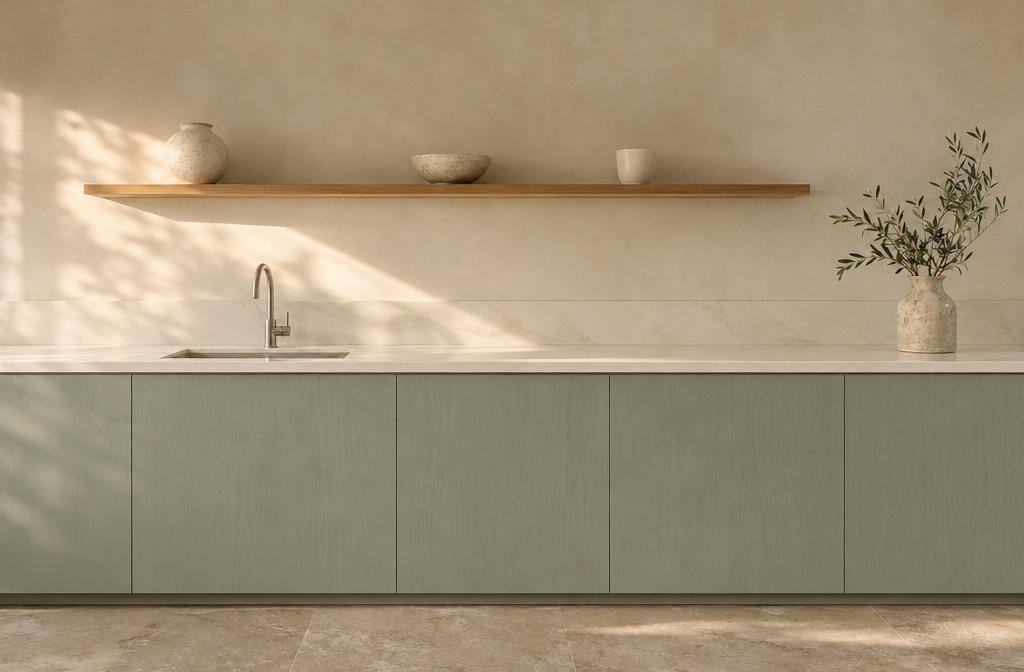
From kitchen photo to finish proposal
01 · Choose the kitchen
Start with the room where the cabinets will stay. A photograph that shows both the cabinet doors and the counter gives you a useful place to study how the materials meet. If the question concerns an island, choose a view that includes its front and its top. If it concerns the wall cabinets, make sure those doors are visible. You can also open the demo kitchen to learn the controls before choosing a photograph of your own. Your photo stays on your device until you choose to upload it for rendering.
02 · Choose finishes and outline the surfaces
Choose a cabinet finish and a countertop finish as a pair. Open Edit surfaces and mark the cabinet faces you want to change. Mark the countertop separately so that its finish follows the work surface. Where an appliance interrupts a run of doors, end the outline at the appliance and start another outline on the other side. Leave any surface you want to keep outside the outlines. The same selection gives you a consistent starting point as you switch between palettes.
03 · Compare the options and export
Switch palettes to review each option on your photo. Move the divider to compare the selected finish with the original. When you can explain the differences you want someone else to consider, choose Create client proposal. Select the options you want that person to see and download the PDF. A proposal can present a shortlist even while the final choice between physical samples is still open.
Three finish palettes, one demo kitchen
A loose cabinet sample in a showroom tells you little about how much of that finish you will see across a whole run of doors. A countertop sample held beside it may occupy half your hand, even though the worktop is a narrow band in the view from your kitchen door. The three previews below keep the camera, the room and the selected surfaces fixed. Look at the same bank of doors in each picture, then follow the edge where the doors meet the counter.
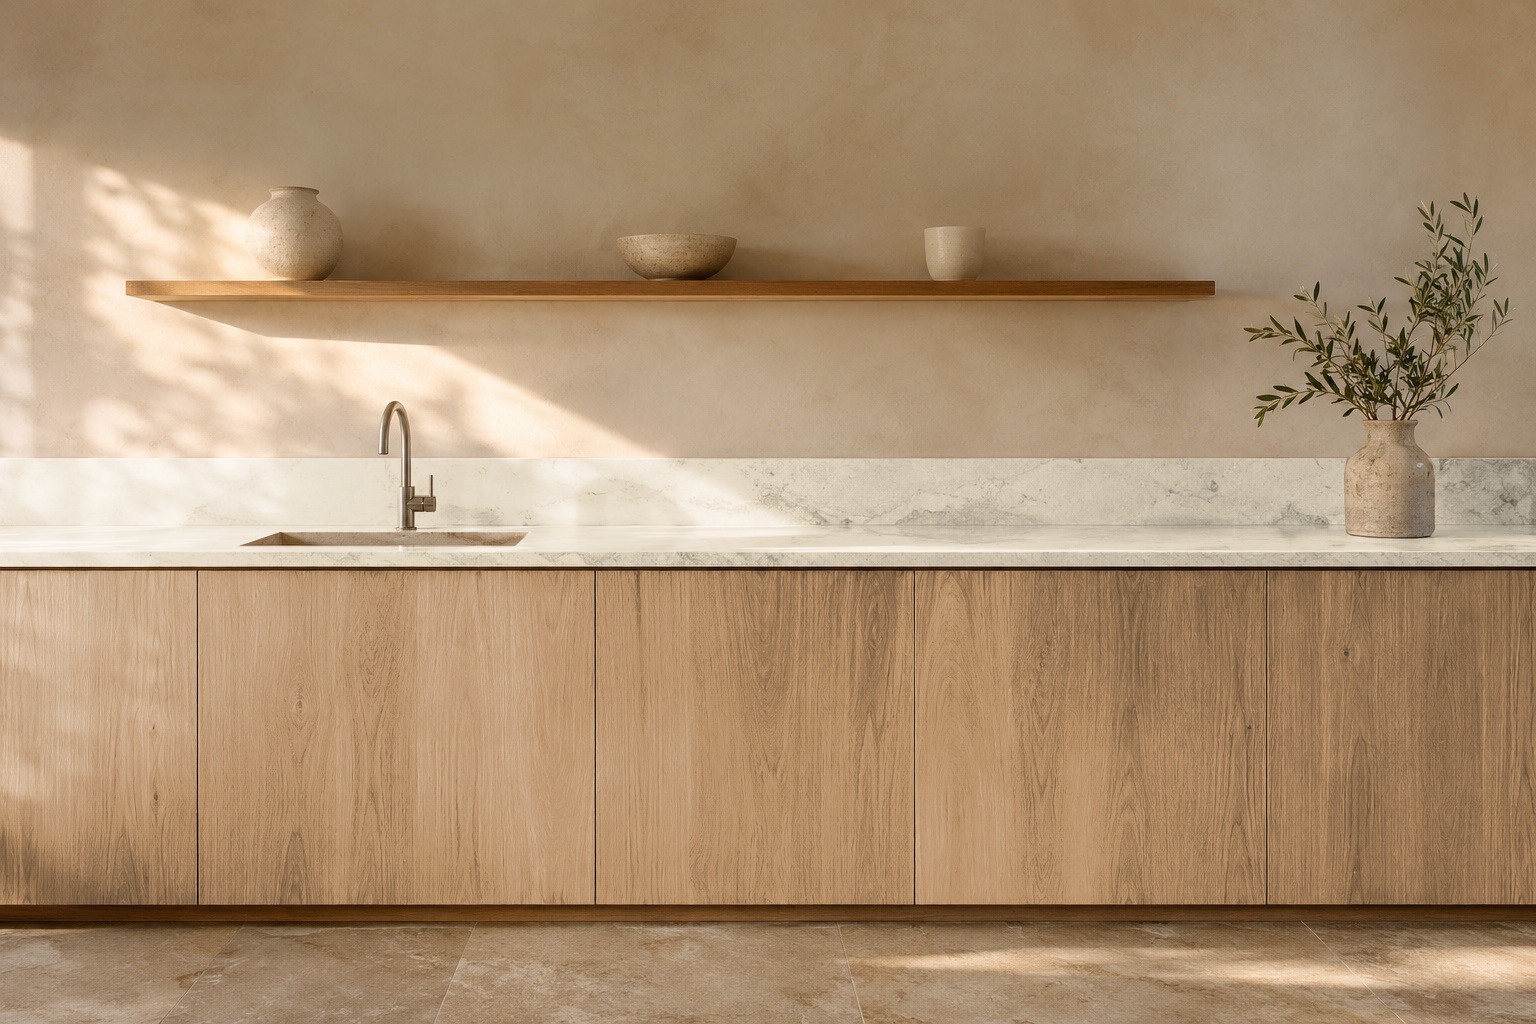
Linen & oak
Demo kitchen, not a customer project. Screen colors are approximate — confirm final selections with physical samples.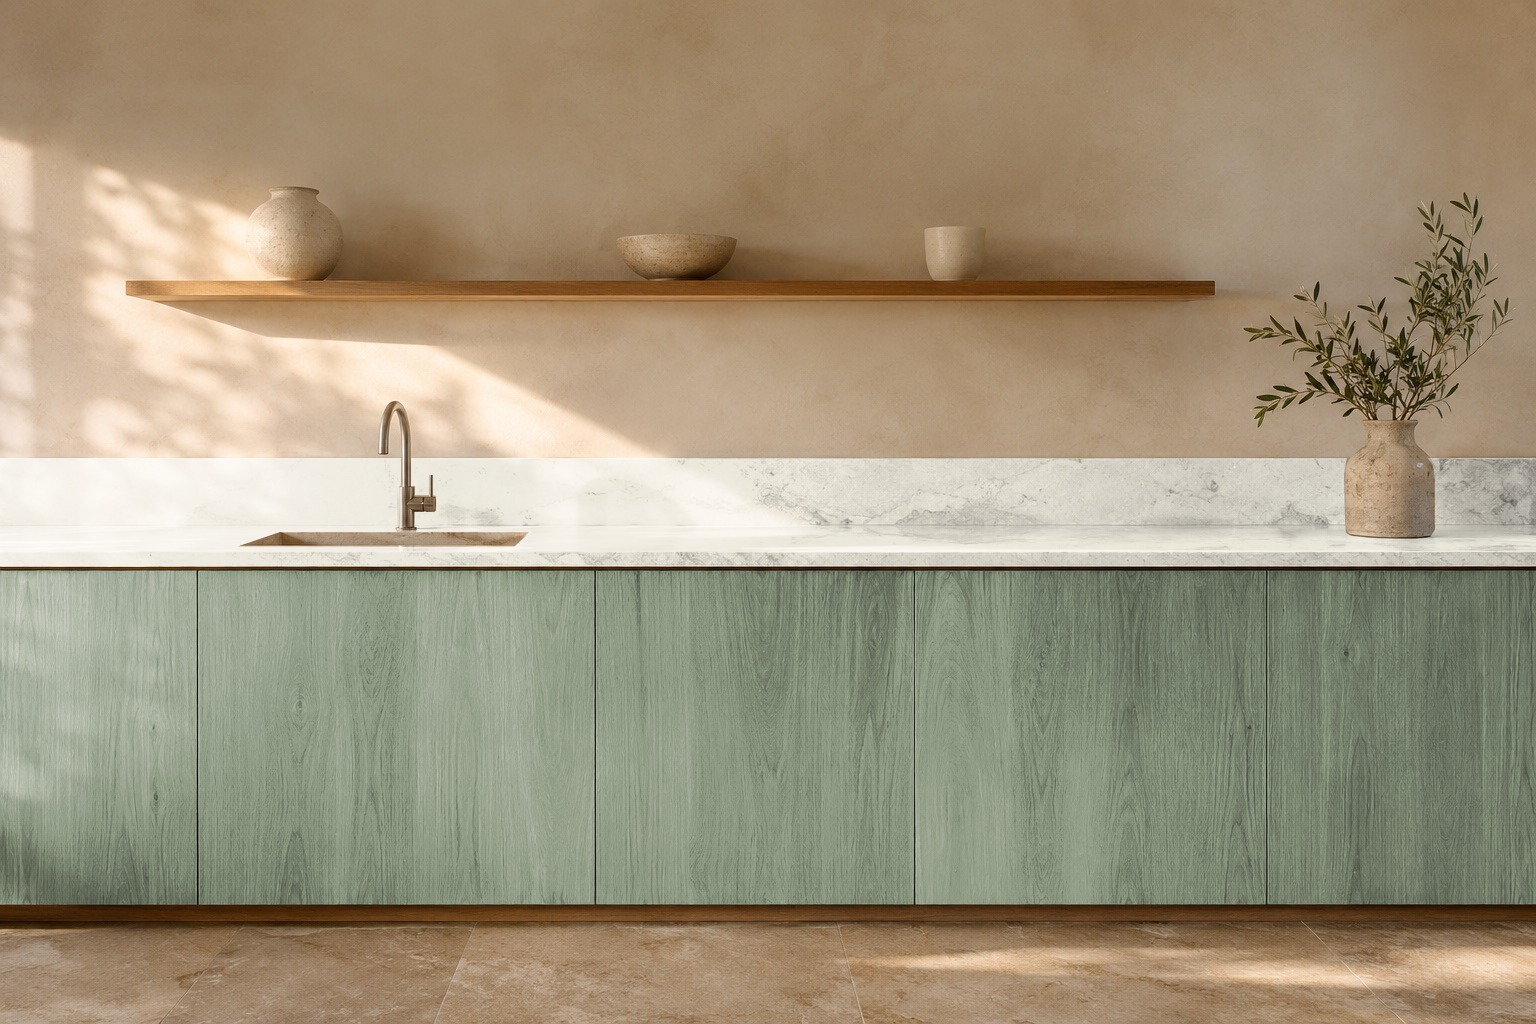
Soft sage
Demo kitchen, not a customer project. Screen colors are approximate — confirm final selections with physical samples.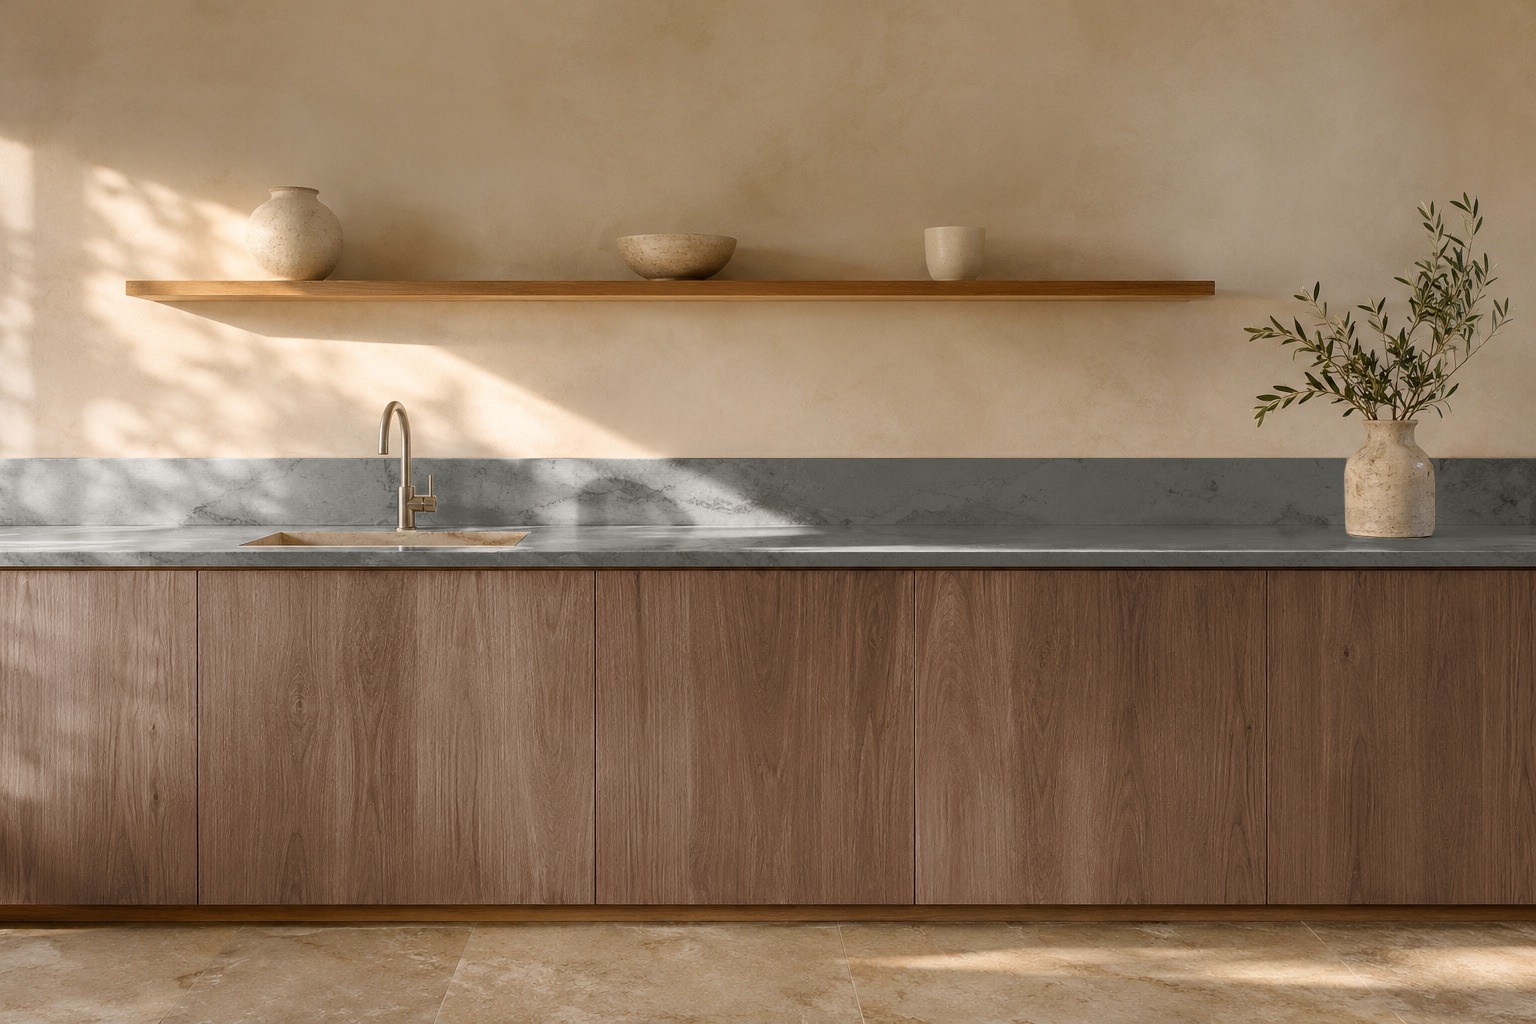
Smoked walnut
Demo kitchen, not a customer project. Screen colors are approximate — confirm final selections with physical samples.Read the pair, then read the room
Begin with Linen & oak. Follow the warm cabinet fronts up to the lighter limestone finish. Now look at the same edge in Soft sage, where the cabinet color sits beside ivory quartz. Finally look at Smoked walnut beside charcoal stone. Notice which boundary catches your eye and which seems to recede. If a client likes the cabinet fronts in one view but prefers the worktop in another, you now have a specific material choice to revisit together.
Try the comparison on your photo
The side-by-side pictures above are fixed previews of the demo kitchen. In the studio, your own kitchen occupies a single preview. Switch between the three palettes to see them in turn. It helps to pick a reference point before switching, such as the corner where the counter meets a tall cabinet. Comparing that same spot each time makes it easier to say what changed, especially if two of the finishes look similar on your screen.
Compare a finish with the original photo
Use the divider when the question changes from “Which palette do I prefer?” to “What would I change about this kitchen?” Draw it across a door face and pause where you can see part of the original beside part of the preview. Move it back to see the original again. You can do this after switching finishes too. The original remains available throughout the comparison, so you can come back to the kitchen you started with whenever a proposed change feels unfamiliar.
The original is also a reference for deciding what to leave alone. If you like the existing counter, compare the cabinet faces while keeping that counter in view. If a panel was included by mistake, review the surface outlines before judging the finish. For a walkthrough focused on picking the faces to change, see the cabinet finish guide.
Why cabinet and countertop finishes belong together
Cabinet doors and countertops share a long edge. A finish you like on its own may give that edge more contrast than you want. Look first at the cabinet and worktop directly below and above that line. Then take in the full photograph. Decide whether you want the counter to stand apart from the cabinet fronts or read as a quieter continuation of them. Both are useful directions to explore before choosing physical samples.
To narrow down which material is driving a preference, keep one of them in its original finish. A countertop-only comparison is especially useful when the existing cabinet doors are already part of the plan. Use the countertop visualizer for the worktop selection steps. Return to the combined view when you want to consider changing the cabinetry as well.
What your client receives in the material proposal
The PDF brings the original kitchen and the selected finish options into a document you can hand to a client. Each option identifies the cabinet and countertop finishes that belong together. That pairing matters when someone returns to the proposal after looking at samples. They can find the kitchen view they liked and see which cabinet finish went with which counter, without having to reconstruct the conversation from separate pictures.
Open the Soft sage sample proposal (PDF) to see how the example reads from the original kitchen through to the finish selection. For your own proposal, choose the palettes you actually want the recipient to consider. If the decision is still open, include the alternatives under discussion. If you are reviewing a preferred pairing, include that pairing so the client can bring the proposal to their sample review.
Demo kitchen, not a customer project. Screen colors are approximate — confirm final selections with physical samples.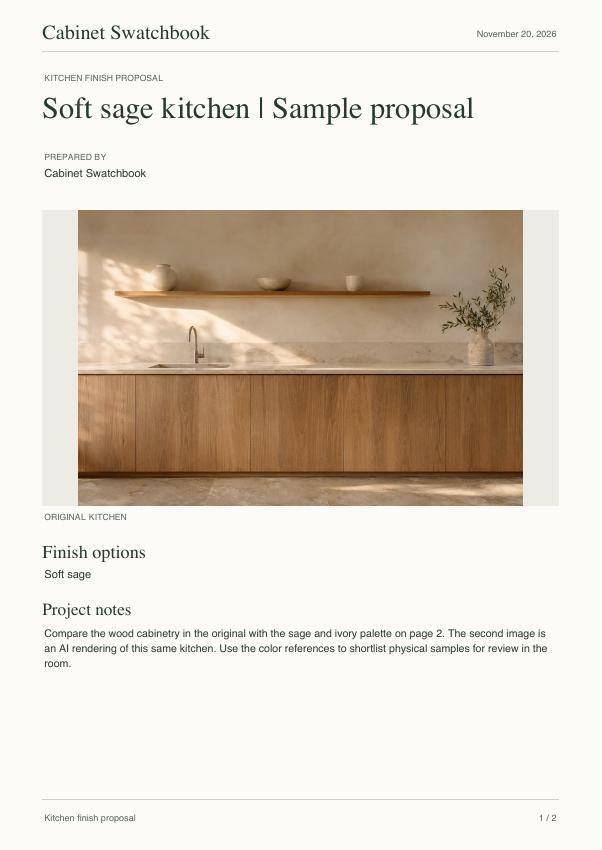
For homeowners and DIY planners
Start with a decision you have to make in your own room. Perhaps you want to keep the counter and are deciding how the cabinet fronts should look beside it. Outline just the doors, switch finishes and compare each with the original. Save the option you want to discuss in a material proposal. Bring it with you when looking at physical samples so you can consider the actual finish alongside the direction you chose on screen.
For cabinet dealers and remodelers
Ask the client which surfaces are part of the job before you start the preview. Use their kitchen view to discuss the cabinet and countertop together. When they express a preference, go back to the original and check that you are talking about the same doors and work surface. Use the PDF to carry those choices into the next conversation. See finish proposals for cabinet dealers and remodelers for the client handoff.
What to confirm with physical samples
A preview helps you choose a direction. Screen colors are approximate, and the tool does not provide precise matches to branded paint codes. Use a physical cabinet sample and a countertop sample together for the final selection. When a client refers to a finish in the PDF, review those samples with the proposal open so everyone knows which pairing is under consideration.
Photo privacy and online rendering
Choosing a kitchen photo for the studio keeps it on your device until you choose to send it for rendering. You can compare the original and the local finish preview while deciding whether to take that step. Online rendering requires an active Studio subscription and available monthly render allowance. You can use the demo kitchen, compare finishes locally, and export an existing proposal as a PDF without signing in or using any allowance. If you use up your allowance, local tools still work and online rendering can resume when your allowance resets at the start of the next UTC calendar month.
Questions about your kitchen preview
Can I use my own kitchen photo?
Yes. Choose your kitchen photo in the studio and outline the surfaces you want to change. The photo stays on your device until you choose to upload it for rendering.
Can I compare several palettes on my photo?
Switch between three palettes on your photo to view one pairing at a time. The side-by-side gallery shows fixed previews of the demo kitchen.
Can I compare the countertop with the cabinets?
Yes. Mark the cabinet faces and worktop separately to preview them as a pair. Leave the surfaces you want to keep outside the outlines.
Can the preview match a branded paint code precisely?
Screen colors are approximate. Use physical cabinet and countertop samples to confirm the final pairing. The preview does not provide precise branded color matches.
Can I give the result to a client?
Yes. Select the palettes to include and export a client material proposal as a PDF.
Are online renders limited?
Online rendering requires an active Studio subscription and available monthly render allowance. You can use the demo kitchen, compare finishes locally, and export an existing proposal as a PDF without signing in or using any allowance. If you use up your allowance, local tools still work and online rendering can resume when your allowance resets at the start of the next UTC calendar month.